
The requirement file in Python traces and manages the packages and upgrades their legacy version. However, sometimes, the project performance is affected when the “pip” and “package” versions are facing compatibility problems. In such scenarios, Python gives flexible access to programmers to automatically upgrade the packages and pip versions by creating a requirement file.
This article will demonstrate how to create a Python requirement file. In this context, the following topics will be covered:
- How to Create a Python Requirements File?
- Create a Python Requirements File Using the “pip freeze”
- Creating a Packages Requirement File
- Reading the Created Python Requirements File
- Upgrade the Requirements File
- Manually Upgrade the Python Packages in Python
- Constructing Requirement Files After Development
- Bonus Tip: Maintain the Package File
How to Create a Python Requirements File?
On Windows, the “requirement” file is constructed and accessed using the “pip freeze” command by invoking a few flags. However, to create a requirement file, utilize the “cmd” prompt.
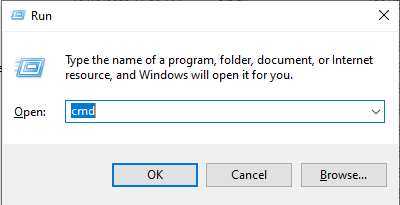
Launch the Command Prompt
First, use the “Win+R” key combination to launch the “Run” Wizard. In the “Open:” field, type “cmd” and click on the “OK” button to start using it:
Create a Python Requirements File Using the “pip freeze”
To get the locally and globally installed Python packages use the “pip freeze” command on “cmd”:
pip freeze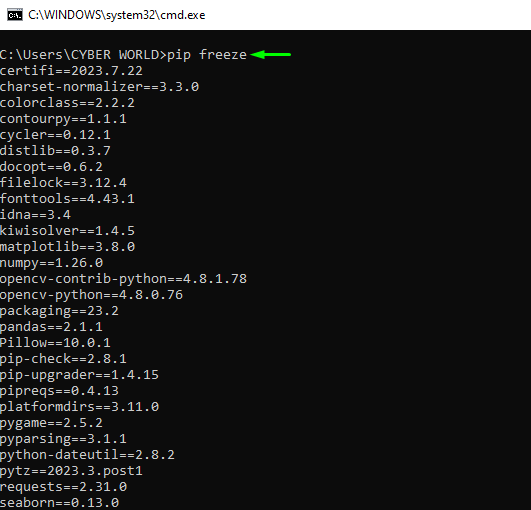
Now move towards creating a requirement file in the environment Path.
Creating a Packages Requirement File
The “requirement.txt” file helps you to trace the Python packages and automatically upgrade their current versions. It helps you manage the manual installation of each outdated Python package, which is a hectic task. However, generating a requirement file saves you time. To build the “requirement” Python package file in the Python project directory, follow the below “pip” command:
pip freeze > <requirement_filename>.txtNote: Replace the “<requirement_filename>” with the requirement file name that you want to set. In our case, the created Python requirements file name is “requirements_packages_file”.
Upon executing the above command, the “requirement.txt” file is created in the same directory where the Python project files were saved:

Reading the Created Python Requirements File
To read all the locally installed Python packages in the “cmd” prompt, utilize the “r” flag. The “r” flag will read all the locally installed packages and their versions and display them on the “cmd” prompt. To read all the Python packages, implement the following “pip” command:
pip install -r requirements__packages_file.txtUpon executing the command you will get all the Python packages and their versions information on the Command Prompt:

Upgrade the Requirements File
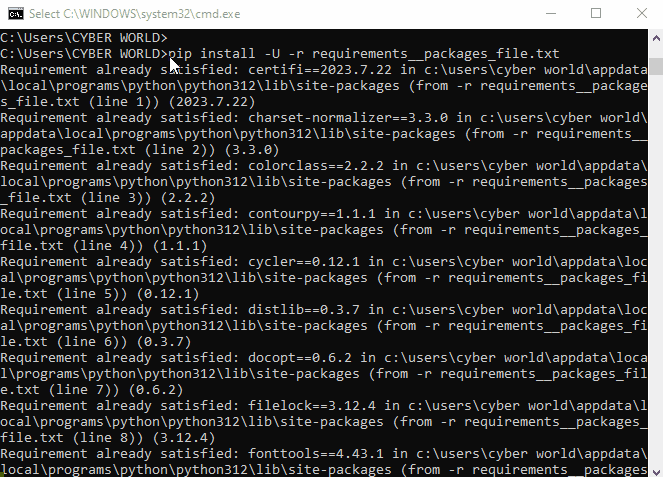
To automatically upgrade the legacy version to the upgraded one, access the Python requirements packages file. To access a Python Requirements file, use the “r” flag to read the Python packages on the Command Prompt. However, to upgrade any outdated version to the latest available version utilize the “-U” flag. For practical execution, follow the below “pip” command:
pip install -U -r requirements__packages_file.txt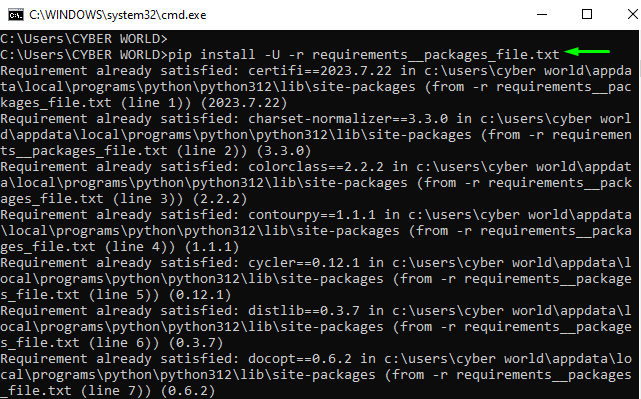
Upon executing the “pip” command, the requirement command will search for any outdated packages and re-download the latest available versions. After processing the outdated package will be re-downloaded and successfully install the latest available version of the Python package automatically:
Manually Upgrade the Python packages in Python
To manually upgrade any particular Python package, check it through the “pip list” outdated flag. The “–outdated” flag will only return the list of the packages that are outdated. To upgrade those particular list packages and their versions utilize the “-U” flag on the “requirement.txt” file as done in the above section.
The below command will only check for the packages that are outdated:
pip list --outdated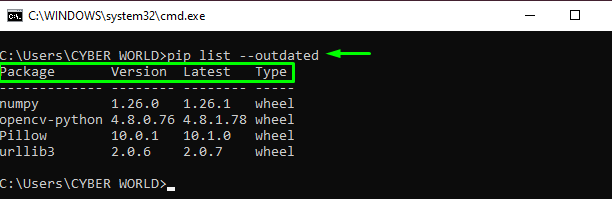
To upgrade the particular package manually utilize the “-U” flag. The “-U” flag will upgrade the package to the currently available latest version. To implement this on “pip”, follow the below command:
pip install -U pillow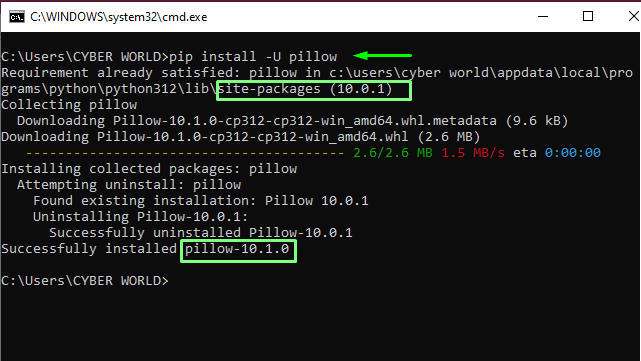
Constructing Requirement Files After Development
To build the requirement file manually of all the packages that are imported in the Python project, use the “pipreqs”. The “pipreqs” will list out all the packages and their version on the “cmd” prompt. Here’s how you can utilize the “pipreqs” commands:
pip install pipreqs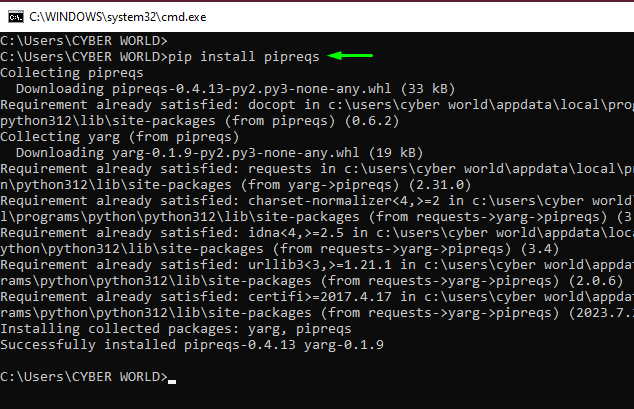
Bonus Tip: Maintain the Package File
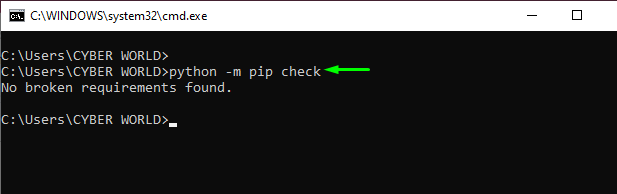
To maintain and manage the requirement package files and their dependencies, go with the “pip check” tool. The “pip check” will trace and update the legacy version to the upgrade one. To utilize the “pip check”, follow the below command:
python -m pip checkThe above command will search and return that there are no missing dependencies found:
That is about creating a Python requirements file.
Conclusion
To create a Python requirement file, first launch the “cmd” prompt from the “Run” wizard then execute the “pip freeze><requirement_file_name>.txt” command. This command will construct the requirement file in the Python project directory. However, upgrading the outdated Python version uses the “-U” flag. This article has demonstrated the command to construct a Python requirements file.
Frequently Asked Questions
How do I create a Python requirements file using 'pip freeze' command?
To create a Python requirements file using 'pip freeze' command, simply run 'pip freeze > requirements.txt' in the command prompt. This will list all installed packages and their versions in a 'requirements.txt' file.
How can I read the Python requirements file that I have created?
To read the Python requirements file, you can simply open the 'requirements.txt' file using a text editor or view its contents in the command prompt using the 'type' command.
What is the significance of a 'requirements.txt' file in Python projects?
A 'requirements.txt' file is crucial in Python projects as it helps manage package dependencies and ensures consistent environment setups across different systems or for collaborative development.
How do I manually upgrade the Python packages listed in the requirements file?
You can manually upgrade the Python packages listed in the requirements file by running 'pip install --upgrade package_name' for each package that needs to be updated.
What is the benefit of using a 'requirements.txt' file to manage Python packages?
Using a 'requirements.txt' file simplifies package management by allowing developers to install all project dependencies at once and maintain a record of required packages and their versions.
How can I construct requirement files after the development of a Python project?
To construct requirement files after the development of a Python project, you can use 'pip freeze > requirements.txt' to capture the current package versions and dependencies for future reference.
How do I maintain a package file in Python projects for better organization?
To maintain a package file in Python projects, regularly update the 'requirements.txt' file with the latest package versions and review dependencies to ensure smooth project performance.
What is the recommended method to upgrade the requirements file in Python projects?
The recommended method to upgrade the requirements file in Python projects is to periodically run 'pip freeze > requirements.txt' to capture the latest package versions and make necessary updates.