
In all Linux distros, including the Debian 12, the “root” user has ultimate access to the whole system. Due to the security reasons, we don’t recommend using it. But, what if you are willing to execute a command with “root” privileges? You can always utilize the “sudo” keyword for elevated or “root” privileges without changing your user with the “root” user.
The “sudo” or “su do” is a keyword that instructs the terminal to execute the specified command with the “root” privileges. However, the user must be in the “sudoers” group to be able to use the elevated privileges.
This guide highlights the methods to “Enable sudo on a User Account on Debian 12”.
How to Enable the “sudo” on a User Account on Debian 12?
In Debian 12, you can enable the “sudo” on a user account via the following approaches:
- Using the usermod Command.
- Utilizing the adduser Command.
- Via the sudoers File.
- Via the Users Settings (GUI)
The following is a detailed explanation of the above-stated methods.
Method 1: Enable “sudo” on a User | the “usermod” Command
The “usermod” command lets you change the user account’s properties. It can also change the group from “users” to “sudo”, as explained in the following steps:
Step 1: Switch to the “root” User
Use the following command to switch with the “root” user to proceed further:
su -
Step 2: Enable “sudo” on a User Account
Now, add the user (testuser in this case) using the below-mentioned command. Doing this enables the “sudo” on the “testuser”:
usermod -aG sudo testuser
Step 3: Refresh the “sudo” Group
After adding a user to the “sudo” group, you need to refresh it for the changes to take effect by executing the below command:
newgrp sudoTo verify the changes, run the following command:
groups testuser
Bonus Tip: Disable the “sudo” on a User Account on Debian 12
If you want to disable the “sudo” for a user account in Debian 12, use the following command and replace “testuser” with the username you want to disable:
gpasswd -d testuser sudo
Method 2: Enable “sudo” on a New/Existing User
The “adduser” command lets you add the users and enables the user group’s management. To add a user and then add it to the “sudo” group, run the below-mentioned commands and replace “newdeb” with the username you want to create:
adduser newdeb
adduser newdeb sudo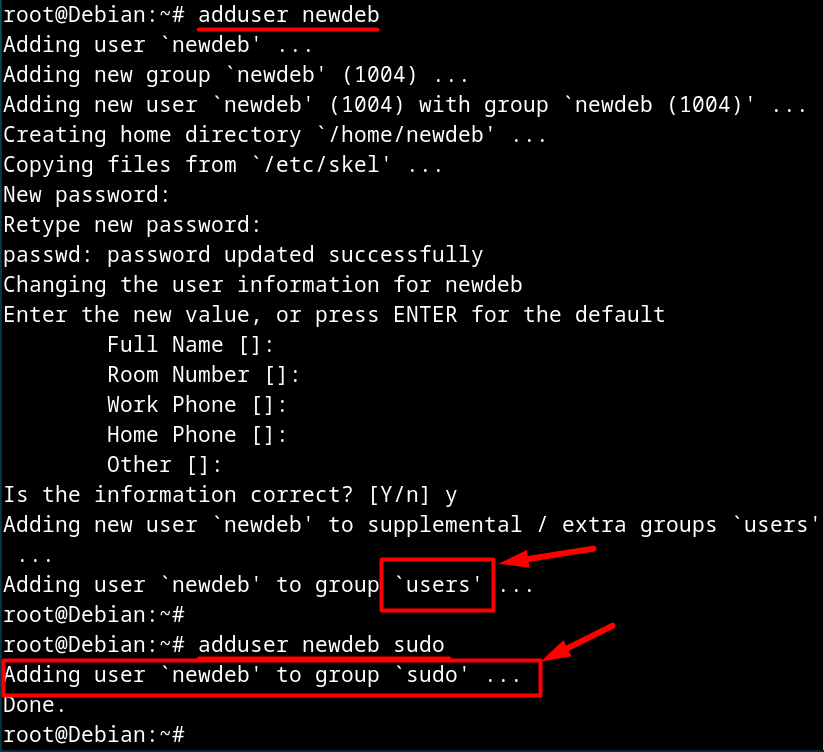
To confirm the addition of the user to the “sudo” group, execute the following command:
getent group sudo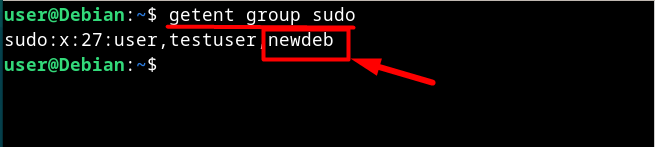
You can use the following command to add an existing user to the “sudoers” file:
sudo adduser newuser sudo
To remove the user from the “sudo” group, use the below command:
sudo deluser newuser sudoMethod 3: Add Any User | Manually Editing the “/etc/sudoers” File
Have you ever wondered how the Linux system assigns privileges to different users? The privileges are based on the group’s privileges that the user belongs to. For instance, a user in the “sudo” group has elevated privileges. These groups are managed in the “/etc/sudoers” file.
Use the below command to create a temporary sudoers file and any changes made to this file are written to the “/etc/sudoers” file. The “/etc/sudoers” file must be run as a root user and this temporary file ensures that no errors are made to the original file. Append “<username> ALL=(ALL:ALL) ALL” to add a user in the sudoers file, as seen below:
sudo visudo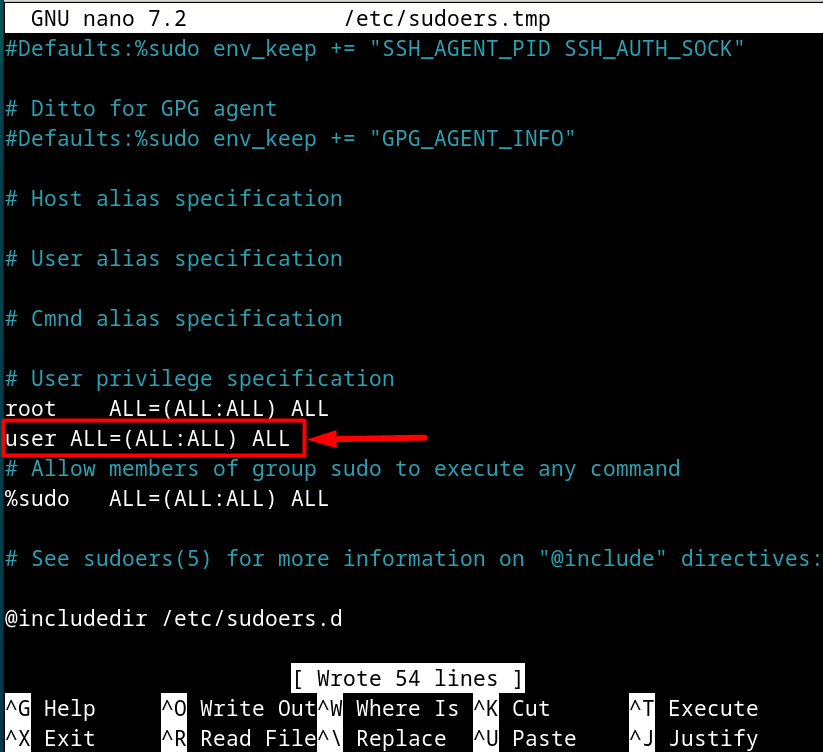
After editing the sudoers file, press the “Ctrl + S” and then “Ctrl + X”. Doing this also removes the error “User is not in the sudoers … will be reported”.
To verify the changes, run:
groups newdeb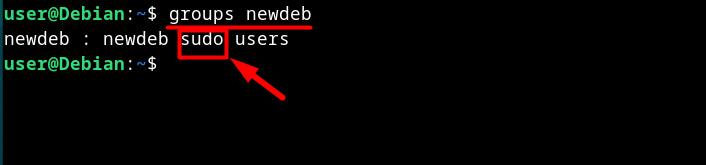
Method 4: Enable “sudo” on a User | Users Settings (GUI)
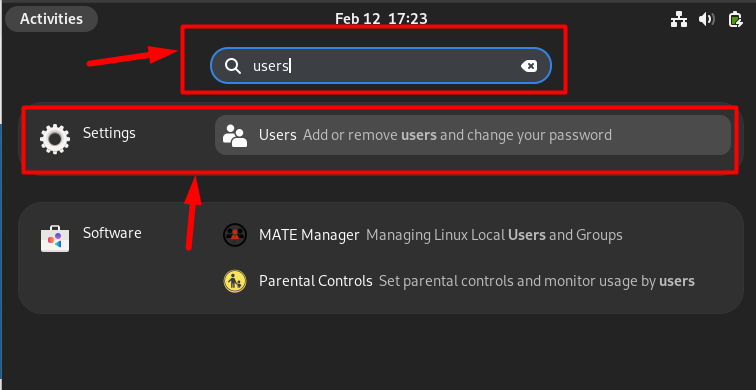
Debian 12 allows the users to manage the user accounts via the GUI as well. You can modify the accounts via the “Users Settings”. Use the “Activities” to open it:
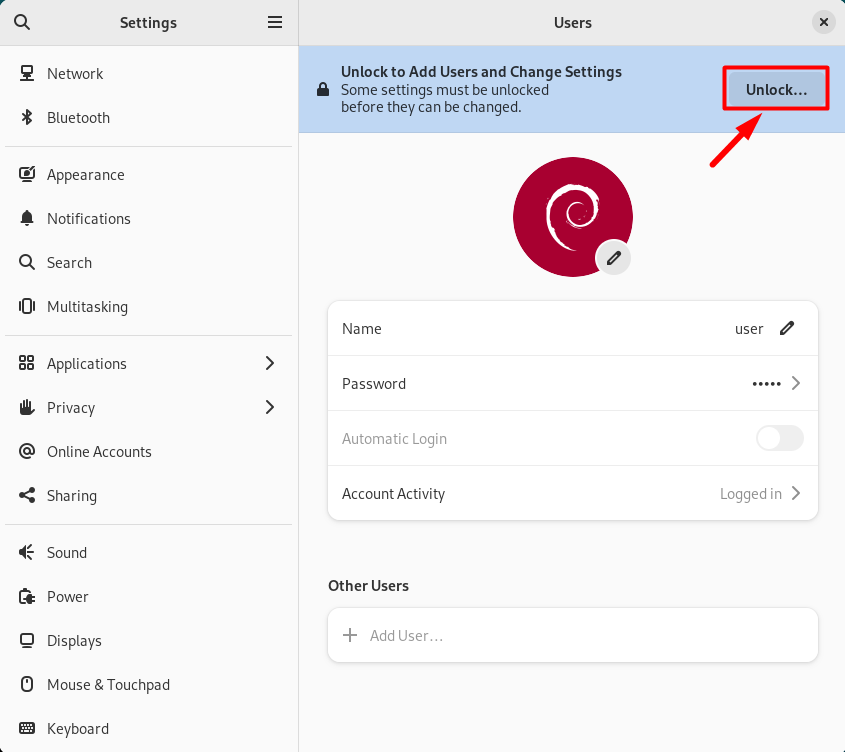
After opening the “Users” settings, unlock the settings using the “Unlock” button and enter your password:
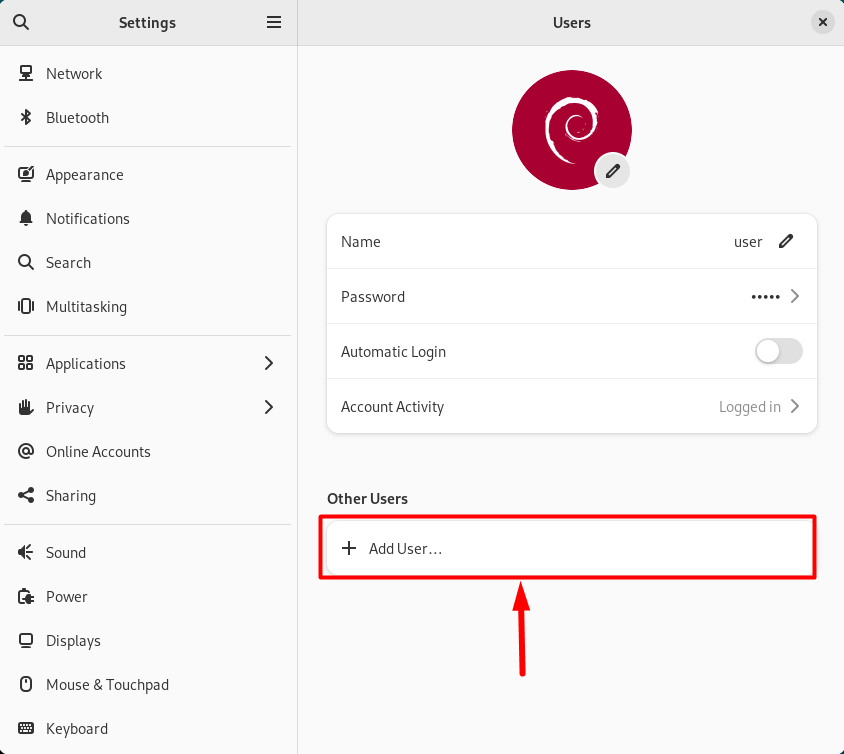
Now use the “Add User” option to trigger the wizard for adding new users:
Next, add the new user’s details, and toggle the “Administrator” before using the “Add” button, as seen below:

Note: You can enable or disable sudo on any user account via the Users Settings only if the current user has the “sudo” privileges.
That’s all for enabling the “sudo” on a user account on Debian 12.
Final Words
To enable the “sudo” on a user account in Debian 12, use the “usermod” or “adduser” commands. Additionally, you can add the user in the “/etc/sudoers” file or enable the “Administrator” option from the “Users Settings”. The users with “sudo” enabled on their account can enjoy the elevated (root-level) privileges to perform pretty much anything on their system. This guide has discussed the methods to “Enable sudo on a user account on Debian 12”.