
Let’s Encrypt issues free TLS certificates, and Certbot is the client that requests them and installs them into your web server. On Debian 13 (Trixie) both Certbot and its nginx plugin are in the main archive, so you can set up HTTPS with APT alone. This guide is for anyone running nginx on a Debian 13 server with a domain name that already points at that server.
Quick answer. Install certbot and python3-certbot-nginx, open ports 80 and 443, run certbot --nginx for your domain, then test renewal with a dry run.
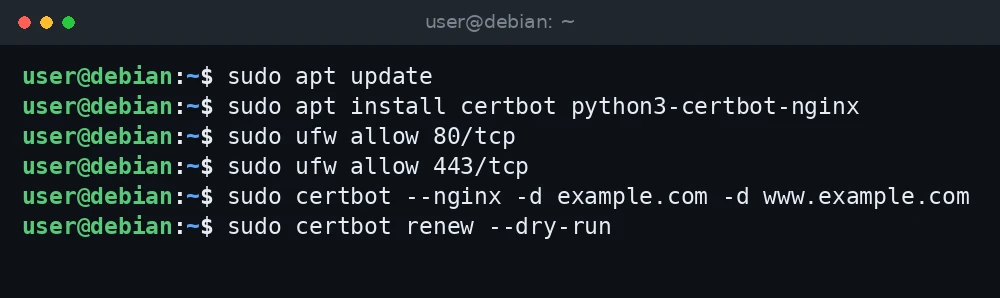
sudo apt update
sudo apt install certbot python3-certbot-nginx
sudo ufw allow 80/tcp
sudo ufw allow 443/tcp
sudo certbot --nginx -d example.com -d www.example.com
sudo certbot renew --dry-run
What was verified and what was not. The commands, flags and paths in this guide were checked against the Certbot documentation (eff-certbot.readthedocs.io), the Let’s Encrypt documentation (letsencrypt.org) and Debian’s package pages and sources (packages.debian.org, sources.debian.org). Package versions were read from APT on a Debian 13 (trixie) server on 3 November 2026. The commands were not run for this guide, so confirm the results on your own system.
Before you start
- A Debian 13 server with nginx installed and running. Debian 13 ships nginx 1.26.3. If you still need it, see how to install nginx on Debian.
- A domain (for example
example.com) with an A record, and an AAAA record if you use IPv6, pointing at the server’s public IP. - A user with sudo rights.
- Port 80 reachable from the internet. Let’s Encrypt’s HTTP-01 challenge, which the nginx plugin uses, only connects on port 80.
The versions in Debian 13 at the time of writing are certbot 4.0.0-2+deb13u1 and python3-certbot-nginx 4.0.0-2. Certbot’s own website recommends its snap package; the Debian packages are a supported alternative that updates with the rest of your system.
Step 1: Install Certbot and the nginx plugin
sudo apt update
sudo apt install certbot python3-certbot-nginx
Check the version:
certbot --versionStep 2: Make sure nginx has a server block for your domain
The nginx plugin finds the right server block by its server_name. Create a simple site file, for example /etc/nginx/sites-available/example.com:
server {
    listen 80;
    listen [::]:80;
    server_name example.com www.example.com;

    root /var/www/example.com;
    index index.html;

    location / {
        try_files $uri $uri/ =404;
    }
}
Enable it, test the configuration and reload nginx:
sudo mkdir -p /var/www/example.com
sudo ln -s /etc/nginx/sites-available/example.com /etc/nginx/sites-enabled/
sudo nginx -t
sudo systemctl reload nginx
Certbot edits this file when it installs the certificate. Its documentation suggests backing up your nginx configuration first, for example with sudo cp -a /etc/nginx /root/nginx-backup.
Step 3: Open ports 80 and 443
If you use ufw, allow HTTP and HTTPS. Keep port 80 open after the certificate is issued, because renewals use it too.
sudo ufw allow 80/tcp
sudo ufw allow 443/tcp
sudo ufw status
If your hosting provider has its own firewall or security group, open the same ports there. Our ufw guide for Debian 13 covers the basics.
Step 4: Issue the certificate
Run Certbot with the nginx plugin and list each name with -d:
sudo certbot --nginx -d example.com -d www.example.comOn the first run Certbot asks for an email address and asks you to accept the Let’s Encrypt terms. It then proves you control the domain, gets the certificate and updates the nginx server block to use it.
The files are stored under /etc/letsencrypt/live/example.com/. The nginx configuration uses fullchain.pem and privkey.pem from that folder. Certbot’s documentation says to point your server at these paths rather than copying the files, because they are updated on renewal.
To see all certificates Certbot manages and when they expire:

sudo certbot certificatesStep 5: Redirect HTTP to HTTPS
According to the Certbot documentation, --redirect is enabled by default for the run command, which is what certbot --nginx uses, so Certbot normally adds an HTTP to HTTPS redirect for you. You can be explicit:
sudo certbot --nginx --redirect -d example.com -d www.example.comUse --no-redirect if you want to keep plain HTTP working, for example while you test. Check the result from another machine:
curl -I http://example.comA redirect shows up as a 301 status with a Location: https://example.com/ header.
Step 6: Check automatic renewal
Debian’s certbot package installs a systemd timer, certbot.timer, and a matching certbot.service. The timer is set to run at 00:00 and 12:00 each day, with a random delay of up to 12 hours. The package also ships /etc/cron.d/certbot as a fallback for systems that do not use systemd. Confirm the timer is active:
systemctl list-timers | grep certbot
systemctl status certbot.timer
Certbot only renews a certificate when it is due. Since Certbot 4.0.0, a certificate is due when less than one third of its lifetime is left (one half for certificates valid for 10 days or less). Before 4.0.0 the cutoff was a fixed 30 days.
Test renewal against the Let’s Encrypt staging server. This does not change your real certificates:
Stuck at this step? Ask us, it is free and include the exact error.
sudo certbot renew --dry-runWhen renewal runs through the nginx plugin, Certbot reloads nginx for you. Check past runs in the journal with journalctl -u certbot.service; see our journalctl guide for filters.
Step 7: Add a name to an existing certificate
If you later add a subdomain, for example blog.example.com, first add it to the server_name line and point its DNS record at the server. Then run Certbot again with the full list of names, old and new. The --cert-name option tells Certbot which existing certificate to replace:

sudo certbot --nginx --cert-name example.com -d example.com -d www.example.com -d blog.example.comLeaving a name out of the list removes it from the certificate, so always pass every name you still need. Run sudo certbot certificates afterwards to confirm the domains and the new expiry date.
To check what a browser will see, request the site over HTTPS from another machine:
curl -vI https://example.comThe verbose output includes the certificate’s subject, issuer and expiry date. If curl reports a certificate problem, the server may still be using an old certificate; reload nginx and try again.
Using Cloudflare in front of the server
If your DNS is on Cloudflare with the proxy turned on (orange cloud), visitors connect to Cloudflare and Cloudflare connects to your server. Two points matter here:
- Validation. Let’s Encrypt’s HTTP-01 challenge reaches your server through the proxy. It follows redirects only to ports 80 and 443 and does not check the certificate on an HTTPS redirect target, so it often works. If it fails, the simplest test is to set the record to DNS only (grey cloud), issue the certificate, then turn the proxy back on.
- DNS challenge. Debian 13 also packages
python3-certbot-dns-cloudflare, which proves control by creating a DNS TXT record through the Cloudflare API. This works with the proxy on, and it is the only way to get a wildcard certificate, because HTTP-01 does not support wildcards.
With a valid Let’s Encrypt certificate on the origin, Cloudflare’s “Full (strict)” SSL mode can verify it. Changing the SSL mode is a zone setting, so make that change deliberately.
Troubleshooting
DNS problem: NXDOMAIN looking up A for example.com
The name does not resolve. Check the record with dig +short example.com A from another machine. A new record can take time to appear, and a typo in the -d name causes the same error.
Timeout during connect (likely firewall problem)
Let’s Encrypt could not reach port 80. Check, in order: the domain resolves to this server, nginx is listening on port 80 (sudo ss -tlnp | grep ':80'), ufw allows 80/tcp, and your provider’s firewall allows it too. See how to check open ports on Debian 13.
Invalid response from http://example.com/.well-known/acme-challenge/…: 404
The request reached a web server, but not the one Certbot configured. Usually the domain points at a different IP, an AAAA record points at another host, or another server block catches the request. Compare the A and AAAA records with the server’s addresses and check server_name.
Could not automatically find a matching server block
No nginx server block has a server_name matching the domain you passed. Add it as in Step 2, run sudo nginx -t, reload nginx and try again.
too many certificates (5) already issued for this exact set of identifiers
You hit a Let’s Encrypt rate limit. The current limits include 5 certificates per exact set of names every 7 days, 50 certificates per registered domain every 7 days, and 5 failed validations per name per account per hour. The limits reset over time and the exact-set limit has no override. Use --dry-run or the --staging option while testing, because the staging environment has much higher limits.
FAQ
Is the certificate really free?
Yes. Let’s Encrypt does not charge for certificates. They are short-lived, which is why automatic renewal matters.
Can I use Certbot with Apache instead?
Yes. Debian packages a separate Apache plugin, python3-certbot-apache, which you use with certbot --apache. The renewal timer is the same.
How do I remove a certificate I no longer need?
Run sudo certbot delete --cert-name example.com. Remove the matching ssl_certificate lines from nginx first, or nginx will fail to reload because the files are gone.
Do I need to close port 80 after switching to HTTPS?
No. Keep it open. Renewals with the nginx plugin use HTTP-01 on port 80, and the redirect sends visitors to HTTPS anyway.
Related guides
- Install nginx on Debian
- Use nginx as a reverse proxy on Ubuntu and Debian
- Set up the ufw firewall on Debian 13
- Install PHP 8.4 on Debian 13