
MariaDB is the default MySQL-compatible database server in Debian, and it is what most WordPress, PHP and web app setups on Debian use. Debian 13 (Trixie) ships MariaDB 11.8 in its main archive. This guide shows how to install it, how root login works on Debian, how to create a database and user, how to allow remote access without exposing the server to everyone, and how to take backups. It is for anyone setting up a database on a Debian 13 server with sudo access.
Quick answer. Install mariadb-server, log in as root through the Unix socket with sudo mariadb, then create a database and a user for your application.
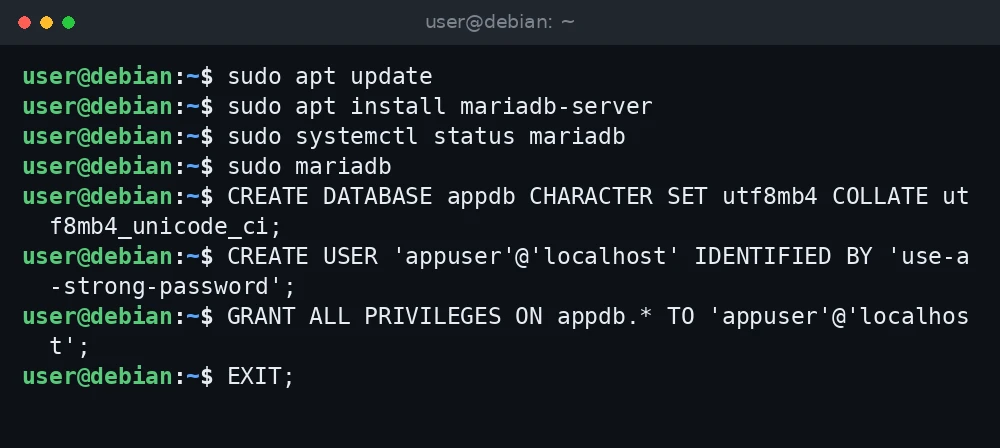
sudo apt update
sudo apt install mariadb-server
sudo systemctl status mariadb
sudo mariadb
CREATE DATABASE appdb CHARACTER SET utf8mb4 COLLATE utf8mb4_unicode_ci;
CREATE USER 'appuser'@'localhost' IDENTIFIED BY 'use-a-strong-password';
GRANT ALL PRIVILEGES ON appdb.* TO 'appuser'@'localhost';
EXIT;
What was verified and what was not. The commands, file paths and defaults in this guide were checked against the MariaDB documentation (mariadb.com/kb), Debian’s package pages (packages.debian.org) and the Debian packaging files for MariaDB, including its README.Debian and default 50-server.cnf (sources.debian.org). Package versions were read from APT on a Debian 13 (trixie) server on 3 November 2026, and from packages.debian.org for MariaDB. The commands were not run for this guide, so confirm the results on your own system.
Step 1: Install MariaDB
Update the package lists and install the server. The mariadb-server package pulls in the client tools as well.
sudo apt update
sudo apt install mariadb-server
At the time of writing, packages.debian.org lists mariadb-server 1:11.8.6-0+deb13u1 for trixie. Point releases update this number, so check yours with:
mariadb --versionThe service starts after installation. Check that it is running and enabled at boot:
sudo systemctl status mariadb
sudo systemctl is-enabled mariadb
The unit is called mariadb.service. Debian also provides mysql.service and mysqld.service names for compatibility with older scripts.
Step 2: Understand root login on Debian
On a new Debian install, the MariaDB root account has no password. It uses the unix_socket authentication plugin instead. That plugin checks which Linux user is connecting through the local socket. If you are the Linux root user, or you use sudo, you get in as MariaDB root without a password. Anyone else cannot log in as MariaDB root at all, with or without a password.
sudo mariadbThis is the recommended way to administer MariaDB on Debian. It is also safer than a root password, because there is no password to guess or leak. Debian’s README for the package also warns that you should never delete the MariaDB root user.
Debian no longer creates the old debian-sys-maint account on new installs. Maintenance tasks now run as root through the socket.
Step 3: Secure the installation
Many guides tell you to run mariadb-secure-installation. The script is installed on Debian 13 and asks a series of questions:
- Enter current password for root (enter for none)
- Switch to unix_socket authentication
- Change the root password
- Remove anonymous users
- Disallow root login remotely
- Remove test database and access to it
- Reload privilege tables now
sudo mariadb-secure-installationOn Debian, though, the package’s README says running it is unnecessary for a fresh install, because Debian’s defaults already cover what it fixes: root uses unix_socket, root cannot log in remotely and there are no anonymous users. It also notes the script can print “Success!” even when it changed nothing. If you run it anyway, press Enter at the first prompt and do not set a root password or switch away from unix_socket. Switching root to password-only login is a common way to lock yourself out of sudo mariadb.
The practical hardening steps are simpler: keep MariaDB listening on localhost (the default), give each application its own user with access to only its own database, and keep the system updated. Our guide to unattended upgrades on Debian 13 covers the last part.
Step 4: Create a database and a user
Open the MariaDB shell as root:
sudo mariadbCreate a database. MariaDB’s default character set on this release is already 4-byte UTF-8, but setting it explicitly makes the intent clear:
CREATE DATABASE appdb CHARACTER SET utf8mb4 COLLATE utf8mb4_unicode_ci;Create a user that can only connect from the same machine, and give it full rights on that one database:
CREATE USER 'appuser'@'localhost' IDENTIFIED BY 'use-a-strong-password';
GRANT ALL PRIVILEGES ON appdb.* TO 'appuser'@'localhost';
Check the grants and leave the shell:

SHOW GRANTS FOR 'appuser'@'localhost';
EXIT;
GRANT and CREATE USER take effect immediately, so FLUSH PRIVILEGES is not needed here. It is only needed if you edit the privilege tables directly.
Test the new account. It uses a normal password, so you do not need sudo:
mariadb -u appuser -p appdbFor a WordPress site, these are the values you put in wp-config.php: database name, user, password and localhost as the host.
Step 5: Allow remote access safely
By default MariaDB on Debian only listens on 127.0.0.1. That is the right setting when the application runs on the same server. Only change it if another machine really needs to connect, for example a separate web server.
The setting is in /etc/mysql/mariadb.conf.d/50-server.cnf:
Stuck at this step? Ask us, it is free and include the exact error.
bind-address = 127.0.0.1Change it to the server’s private IP address (for example 10.0.0.5) rather than 0.0.0.0 if you can. A private address keeps the database off the public internet. Then restart MariaDB:
sudo systemctl restart mariadb
sudo ss -tlnp | grep 3306
Create a user that may connect only from the client’s IP address, not from anywhere:
CREATE USER 'appuser'@'10.0.0.20' IDENTIFIED BY 'use-a-strong-password';
GRANT ALL PRIVILEGES ON appdb.* TO 'appuser'@'10.0.0.20';
Finally, allow port 3306 only from that client in your firewall. With ufw:
sudo ufw allow from 10.0.0.20 to any port 3306 proto tcpAvoid 'appuser'@'%' combined with a public bind address. That lets anyone on the internet try passwords against your database. If the client is far away, an SSH tunnel is often a better choice than opening port 3306 at all. See our guides on ufw on Debian 13 and hardening SSH.
Step 6: Back up with mariadb-dump
mariadb-dump writes a database out as SQL statements. For InnoDB tables, which are the default, --single-transaction takes a consistent snapshot without locking the tables for the whole dump:
sudo mariadb-dump --single-transaction --routines --triggers appdb > appdb-$(date +%F).sqlTo back up every database, including the user accounts in the mysql system database:
sudo mariadb-dump --single-transaction --routines --triggers --all-databases | gzip > all-databases-$(date +%F).sql.gzRestore a single database into an existing, empty database:

sudo mariadb appdb < appdb-2026-11-03.sqlDump files can contain personal data and password hashes, so keep them in a directory only root can read, and copy them off the server. Our rsync backup guide shows one way. The older name mysqldump is still installed and works the same way.
Troubleshooting
ERROR 1698 (28000): Access denied for user ‘root’@’localhost’
You ran mariadb -u root or mariadb -u root -p as a normal Linux user. Root uses unix_socket, so the Linux user must be root. Use sudo mariadb instead. Applications should never log in as root; give them their own user as in Step 4.
ERROR 1045 (28000): Access denied for user ‘appuser’@’localhost’ (using password: YES)
The password is wrong, or the user exists for a different host. A user is the pair of name and host, so 'appuser'@'localhost' and 'appuser'@'10.0.0.20' are separate accounts. List them with SELECT User, Host FROM mysql.user; as root, and reset a password with ALTER USER 'appuser'@'localhost' IDENTIFIED BY 'new-password';.
ERROR 2002 (HY000): Can’t connect to local server through socket ‘/run/mysqld/mysqld.sock’
The server is not running. Check it and read the log:
sudo systemctl status mariadb
sudo journalctl -u mariadb --no-pager -n 50
A full disk is a common cause; see how to check disk space on Debian 13.
ERROR 2003 (HY000): Can’t connect to MySQL server on ‘10.0.0.5’
A remote client cannot reach port 3306. Check that bind-address is not still 127.0.0.1, that MariaDB was restarted after the change, and that the firewall allows the client’s IP.
FAQ
Should I set a password for the MariaDB root user?
On Debian, it is usually better not to. Socket authentication means only the Linux root user can log in as MariaDB root, and there is no password to steal. Create separate password-based users for applications and tools.
Is MariaDB a drop-in replacement for MySQL?
For most web applications, including WordPress, yes. The client protocol and SQL are compatible, and the old mysql and mysqldump command names still work. Some newer MySQL-only features differ, so check your application’s requirements if it targets MySQL specifically.
Where are the data files and logs?
Data lives in /var/lib/mysql by default, and the main configuration is in /etc/mysql/, with server settings in /etc/mysql/mariadb.conf.d/50-server.cnf. Server messages go to the systemd journal, which you can read with journalctl -u mariadb.
Can I manage MariaDB from a web interface?
Yes, phpMyAdmin is the common choice. Our phpMyAdmin guide is written for Ubuntu 24.04, but the steps are similar on Debian. Do not expose it to the public internet without extra protection.